Gisele's Top 10 Tools and Brushes
I have been having such a great time traveling and meeting so many of you on the road. Recently at the Houston Expo for Artists I was conducting a demonstration in the Loew-Cornell booth when the bells went off in my head for this new article. As I was talking to y’all (Texan for you all), I discovered that there were so many tools and techniques that are my favorites that you may not know about. Each person uses tools in a different way and has their own favorite tool, but I thought this would be a great opportunity for me to introduce you a few of MY favorite things.
Tools If you have seen me demonstrating at any of the shows recently, you will know that my favorite tool is the fine line painting pen. Used for line work and detail, it is a great way to sign your artwork or master the curlicues and curves in lettering and detail. It is especially practical for those with a shaky liner hand, production artists, or for projects that require a great deal of detail. The well in the fine line pen can be filled with your favorite medium, from ink to oils, to acrylic paints. Check out how to use it on our website.
For preparing a flawless surface, you cannot beat Super Film. Years ago, when I discovered how wonderful it was to paint on a wet sanded surface, I was hooked. Super Film is a thin sheet of “sandpaper” that can be used wet or dry. I prefer it over traditional wet/dry sandpaper because it does not fall apart after numerous uses. It is great for sanding between prep, basecoats and varnish coats.
Everyone uses roller brushes to paint walls, but when I have a furniture piece, flat surface or a canvas, I do not take my precious painting time applying coats of paint with a brush because I am anxious to get to the detail part of the painting experience. If you have not discovered how easy it is to prep a piece with a roller, you are working way too hard. I recently went to a seminar where they had a day set aside for prep. You could stop by anytime during the day to get the prep done. In face, most students were there early and had been prepping for a bit when I came in. I sanded the piece and whipped out my roller brush and got all of the base coating done in an hour and then dashed out the door to do some retail therapy while they continued on. This is probably my biggest timesaver for prepping for large classes where I am required to do all of the base coating for the students.
Storage For holding mediums and mixed paints, I love storage cups. I used to use film canisters to store paints and mediums, (boy does that date me!) but cannot seem to find a good supply for them anymore and it was difficult to see what medium or paint I was storing. They are especially great for traveling to seminars, since most teachers supply the paint. However, if you don’t finish the piece or need a mixed color, it is great to a have a few of these on hand to take paint home.
Like most artists, I cross over into other categories of art supplies and have a hard time trying to organize and store it all. I use these cups for beads, buttons, ribbon, brads, and, well, just about anything I can fit into them! The added bonus for me is actually being able to find my supplies while looking fashionable on the shelves in my studio!
When I first started to paint, I used an empty tomato can to hold my brushes and hated the way the all touched each other, sometimes causing damage to the brush hairs. I was always on the prowl for a good way to store brushes in my studio and found the carousel organizer. It has a ton of slots for brushes, pencils, brushes, palette knives, more brushes – you get the idea! I also love the extra wells for storing my chalk, erasers, cotton swabs, etc. It keeps my supplies neat and organized and gives me extra time to paint!
Speaking of paint beginnings, on the first week of beginner classes, I would instruct my students to go to the market and buy a basket of strawberries and a container of Cool Whip then go home and eat the berries and cream then stack the containers to use for their water basin. I found out early on that by having some kind of ridge on the bottom of the water bowl, it kept your brushes cleaned out. I am so thankful for the innovation of brush basins and the one with the paint saver in the center is my favorite. I use it as a wet palette and have a couple of extras in the studio labeled by project.
Brushes We all know the importance of a good brush, and I find that the ease of use, technique and application can make the performance of a brush that much better so I will try to explain why I especially like these products and give you some hints on using them.
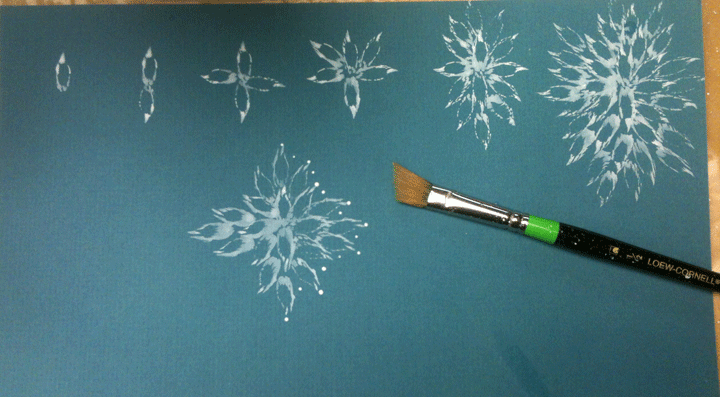
JS liner As a decorative artist, I find that border designs, folk art flowers and backgrounds just look better with stroke designs, but could not find a brush that made these strokes easily. When I discovered the JS liner, I found my favorite stroke brush. The reason that I love this brush so much is that the longer scroll hairs help transition the head, body and tail of the stroke for me with minimal effort. The raised thickness of each brush stroke add texture to the design and I find that I can make various sizes by just using this one brush. Click here to check out a video on the JS Liner.
Filberts The filbert brush has to be some kind of secret weapon for artists. I don’t think that I could live without this versatile brush in my arsenal. From base coating to stroke application to shading, blending and varnishing — the filbert brush is perfect for so many things!
Filbert rake Since I am on the subject of filberts, I have to interject my love for the filbert rake. I used to use the regular rake brush for Santa beards, grasses and basket weave, and still do, but for the smaller areas and for finer detail, I call on the filbert rake. Super easy to use and the softer hairs and shape allow for much finer detail and control than the traditional, stiffer rake.
18/0 liner with short handle One of the most effective tools in any artist’s box is their favorite liner. The 18/0 is mine! For tight control and easy execution, I use the short handled 18/0 liner. The shorter handle makes it easy to hold and the brush hairs hold paint well and allow me to make the thinnest lines ever!
I know that I said top 10... but I have to share one more item I must share with you!
Woodsies Since I have started Zentangling (link to Zentangling article on website), I have gotten hooked on making pins and jewelry. For the Houston Artist Expo, I had created some pins for us to wear in the booth and wanted to make a necklace to wear for the HOOT convention coming up in Ohio so I brought a few of the Woodsies shapes with me to work on. First, I have to tell you that I used to sit in the garage with my scroll saw and stack cut out wooden shapes for pins, ornaments and add ons for my art and it is NOT EASY to cut a great circle or curve, let alone one that is consistent in size or shape. These precut wooden shapes are a life-saver (not to mention finger saver with me and my saw!). They come in all kinds of great shapes and paint up super easy and can be glue and stacked to satisfy even my imagination.
Check out Gisele’s Zentangle necklace at the Loew-Cornell booth at HOOT!
Just because you cannot attend a tradeshow, doesn’t mean you have to miss out on the fun, so I hope you enjoyed my top 10….or eleven favorites. Share your favorites with me at the upcoming HOOT convention. I will be at the Loew-Cornell booth #417, August 11-14.
Happy Painting!